As per Wikipedia:
Disk Utility is a system utility for performing disk and disk volume-related tasks on the macOS.
Day-to-day functions supported by Disk Utility are:
- Creation, conversion, backup, compression and encryption of logical volume images from a wide range of formats read by Disk Utility to .dmg or, for CD/DVD images, .cdr
- Mounting, unmounting and ejecting external disk volumes
- Enabling or disabling journaling
- Verifying a disk’s integrity and repairing it if the disk is damaged
- Erasing, formatting, partitioning and cloning disks
- Secure deletion of free space or disk using a “zero out” data, a 7-pass DOD 5220-22 M standard, or a 35-pass Gutmann algorithm
- Adding or changing partition table between Apple Partition Table, GUID Partition Table and master boot record (MBR)
- Restoring volumes from Apple Software Restore (ASR) images
- Checking the S.M.A.R.T. status of a hard disk
- Disk Utility functions may also be accessed from the OS X command line with the diskutil and hdiutil commands.
Now, we will learn how to partition disks,
Important Note:
- Partitioning a disk erases all the data previously stored on it
- The disk utility’s partition feature divides the disk into partition sections, which appear on the desktop as separate disks.
Precaution: Before proceeding, backup all your computer data using Time Machine on a hard drive other than the one you are currently partitioning.
Here is how to Partition a disk
Step 01:
Connect the External Disk to your Mac using a USB / FireWire cable to partition it
Step 02:
Locate ‘Disk Utility App in Applications > Utilities
Step 03: Select the disk that you want to partition and click on Erase
Step 04: When erasing the disk, a pop-up will appear under the ‘Name’ section. Give the disk a name. Under the Format section, choose ‘OSX Extended (Journaled) ‘. Under the Scheme section, choose ‘GUID Partition Map’ in the dropdown.
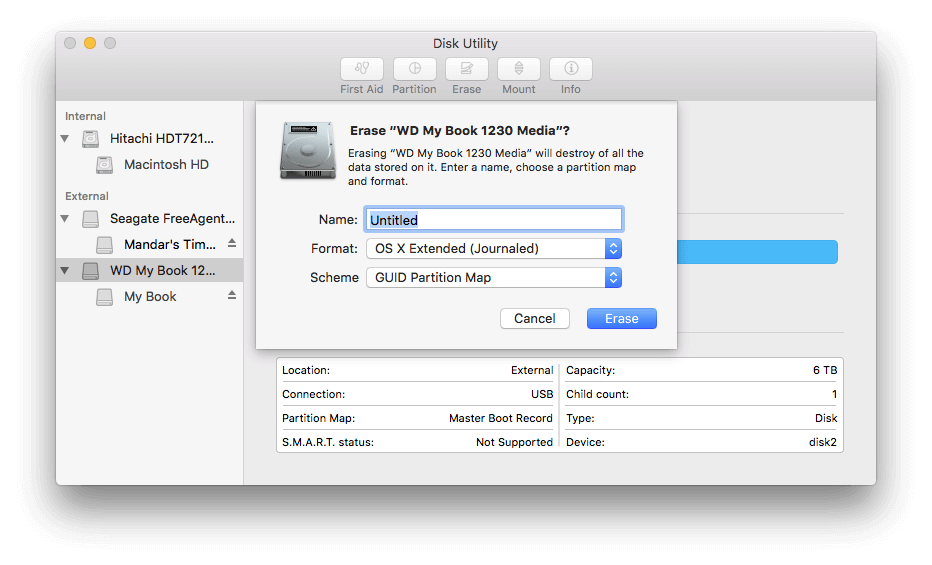
Click on Done once Disk Utility finishes erasing the disk
Step 05: When the disk you want to partition is selected, click on a partition.
Step 06: Tweak the number of partitions from the Volume Scheme pop-up menu. You can add remove & manage number of partition by using ‘+’ & ‘-’ sign
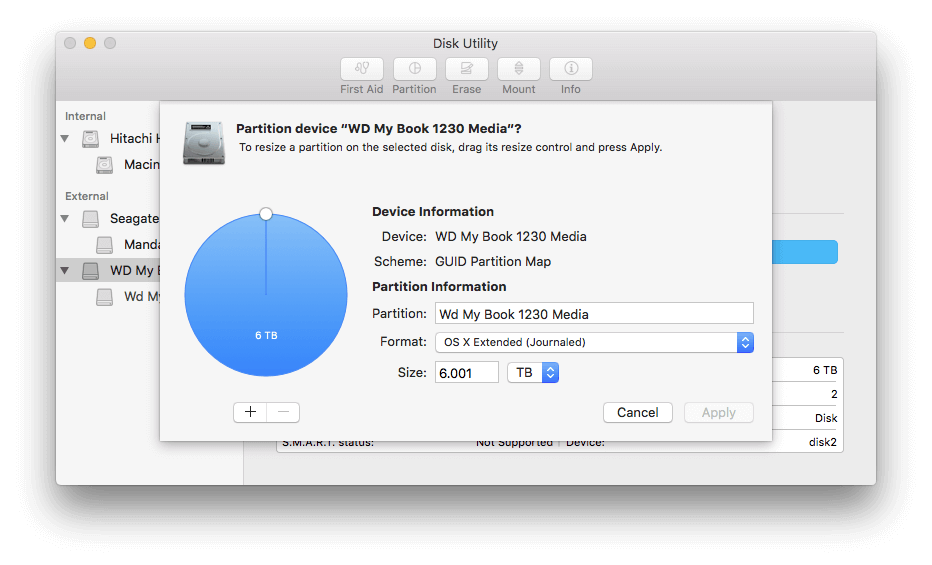
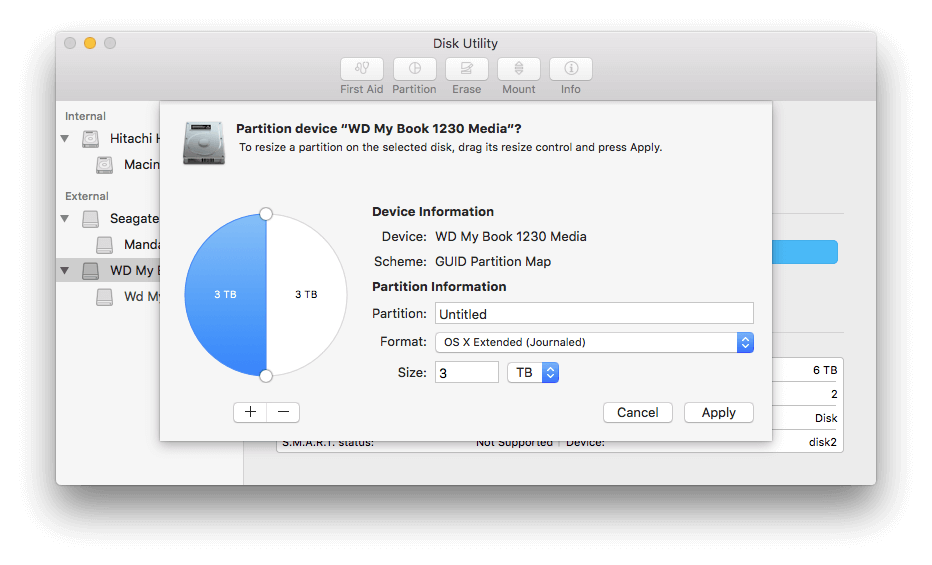
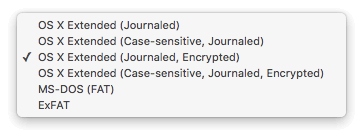
Step 07: Click each partition and type a name for it, choose a format such as OS X Extended (Journaled) and then type a size. You can also drag the divider between the partitions to change their sizes. If a partition’s name has an asterisk beside it, it’s shown larger than its actual size to display its name.
Step 08: As shown in the below image, you can choose various formats, such as ‘OS X Extended (Journaled, Encrypted),’ to password-protect your external disk. While partitioning the disk using an encrypted volume, Disk Utility will ask you to enter and set a password for the new external disk.
I hope this information helps you to partition your new external disk drive successfully,
Thanks & Regards
Mandar Apte